Today we are going to configure a IPv4 Address for your Windows OS so we can log through Remote Desktop.
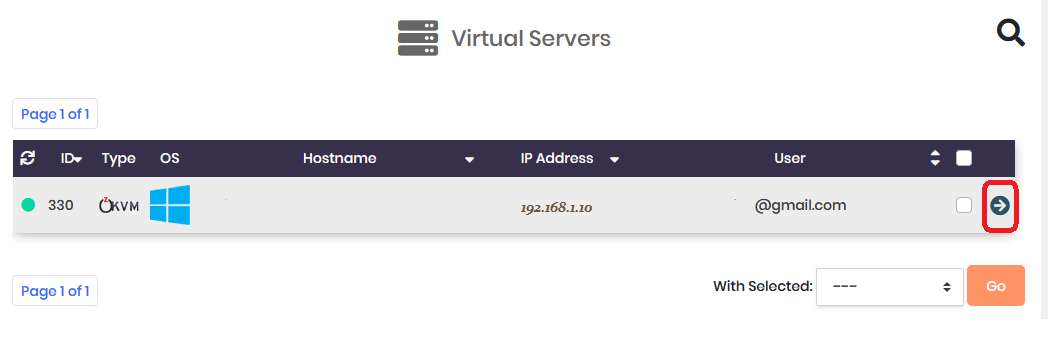
First log into VPS Control Panel and select your instance.
1. Click on the 'Right Arrow button' under VPS Management Section
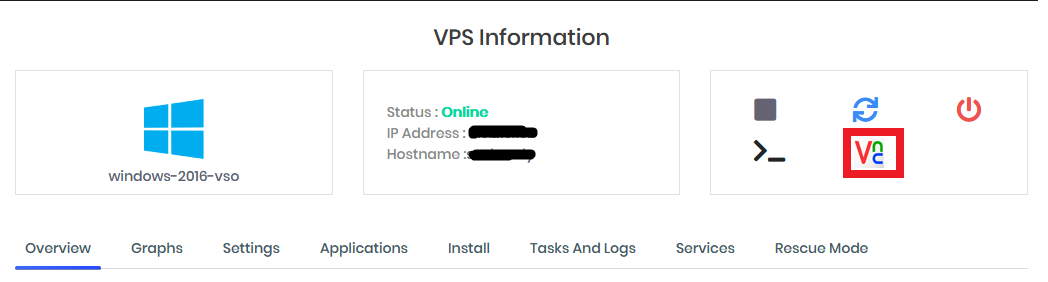
2. Select the VNC ICON and Click on it.
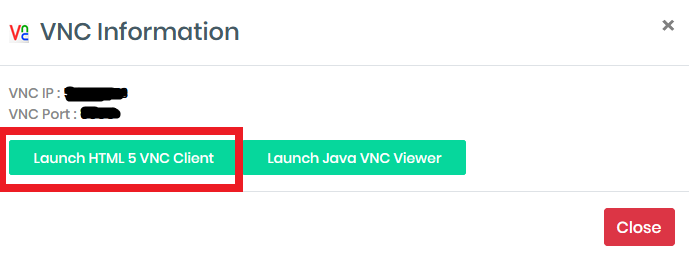
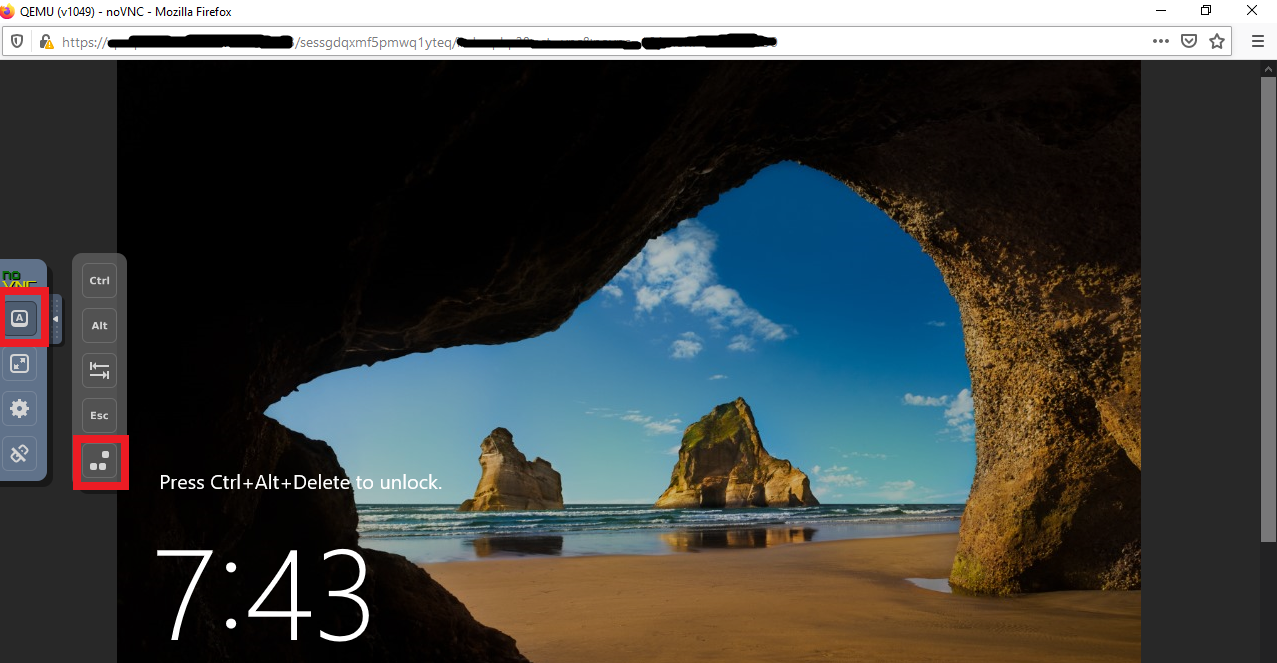
3. Once clicked, a separate browser window will open and once loaded click on 'Launch HTML 5 VNC Client'
4. Once it loads click on the ' A ' icon and then on the ' .: Shaped Block ' and then provide the username and password provided to you.
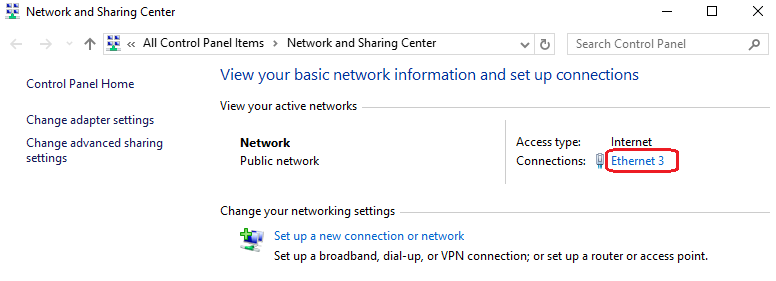
5. On the Bottom of the screen 'Right Click the Network Settings Icon'
![]()
6. Click on the ' Open Network and Sharing Center '

7. Click on Ethernet Adapter
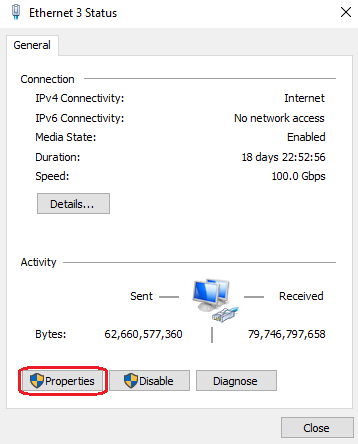
8. Once the screen is loaded Click on ' Properties '
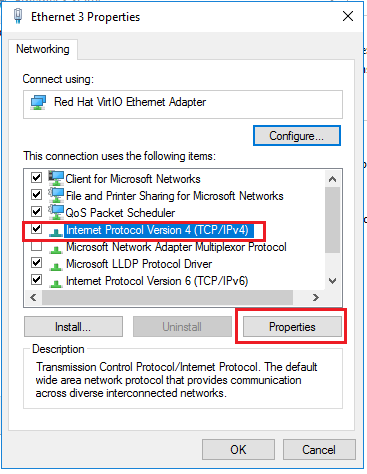
9. Double Click on ' Internet Protocol Version 4 (TCP/IPv4) ' or Select ' Internet Protocol Version 4 (TCP/IPv4) ' and click on ' Properties '.
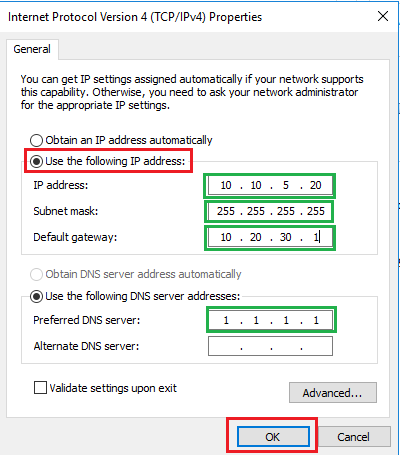
10. Change the IP setting according to your E-Mail (THIS IS DIFFERENT FOR EACH CUSTOMER) and Click on ' OK ' twice.
BELOW IP ADDRESSES ARE NOT REAL AND YOU MUST CHANGE THEM
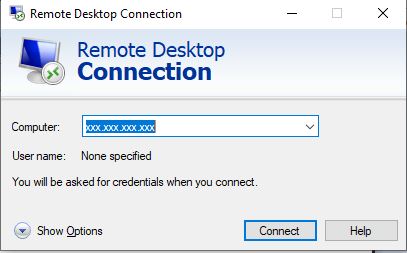
11. Try login into your RDP with Remote Desktop Client. Replace xxx.xxx.xxx.xxx with your Server IP.