In DirectAdmin it’s very easy to install a free Let’s Encrypt certificate. This can be achieved through the graphical interface. The SSL certificate is valid for 60 days and it will automatically renew.
To request and install an SSL certificate in DirectAdmin, follow these simple steps:
Step 1: Log in to your DirectAdmin Panel.
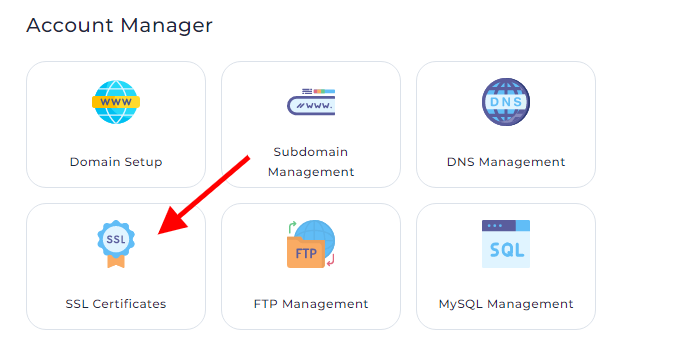
Step 2: Navigate to the Account Manager and click on SSL Certificates.
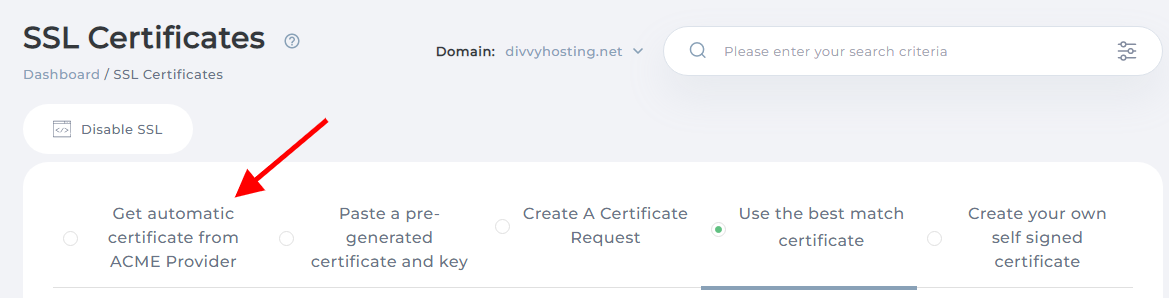
Step 3: Look for the tab labeled "Free & automatic certificate from Let's Encrypt" and click on it.
Step 4: Select the addresses for which you want SSL certificates. Typically, you'll want to secure your domain (e.g., domain.com), its subdomain (e.g., www.domain.com), and the mail subdomain (e.g., mail.domain.com).

Step 5: Once you've made your selections, click the SAVE button. DirectAdmin will then proceed to install the SSL certificates for you. You will be redirected to a page displaying the details of the installation. A confirmation message will also be shown, indicating the successful completion of the Let's Encrypt certificate request for your chosen addresses.

Step 6: To ensure everything is working correctly, clear your web browser cache and access your site using the HTTPS protocol (e.g., https://www.domain.com). This will allow you to verify if the certificate is functioning as expected.
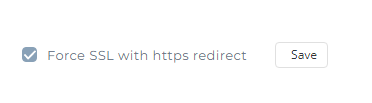
Additionally, if you wish to redirect all incoming requests to the secure version of your site automatically, you can enable the "Force SSL with HTTPS redirect" option by checking the corresponding checkbox in the DirectAdmin interface. Don't forget to click the Save button to apply the changes.
By following these steps, you can easily and quickly secure your website with a free Let's Encrypt SSL certificate in DirectAdmin, providing a safe browsing experience for your users while boosting their trust in your site's security.
