Today, we are going to configure an IPv4 address on your Windows Server so that you can connect to your VPS using Remote Desktop (RDP).
First, log in to your VirtFusion Panel and access your Windows VPS by following the steps below.
Step 1: Access Your Windows VPS
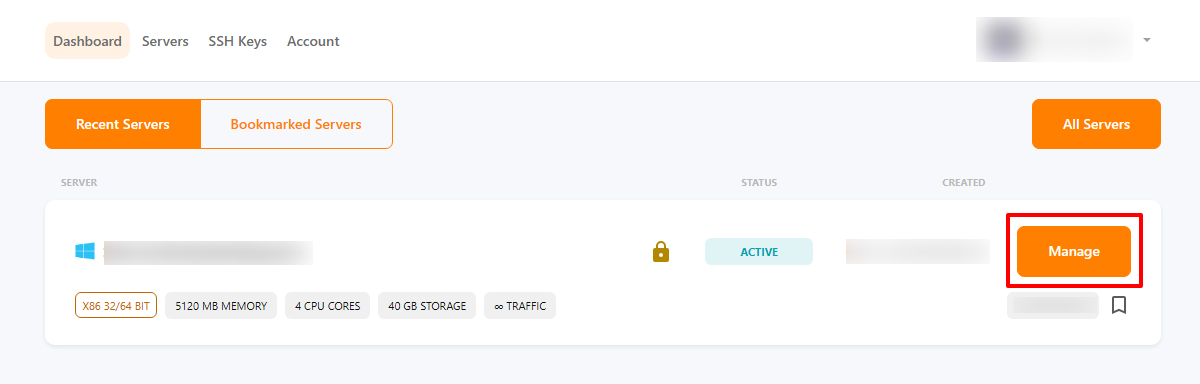
After logging in to the VirtFusion Panel, you will be redirected to the Dashboard. If your Windows VPS is listed under Recent Servers, click the “Manage” button next to the relevant VPS.
If you have multiple VPS instances and your required server is not displayed on the Dashboard, click “All Servers” to view the complete server list. Locate the relevant Windows VPS and click its “Manage” button to access the server management page.
Step 2: Open the VNC Console
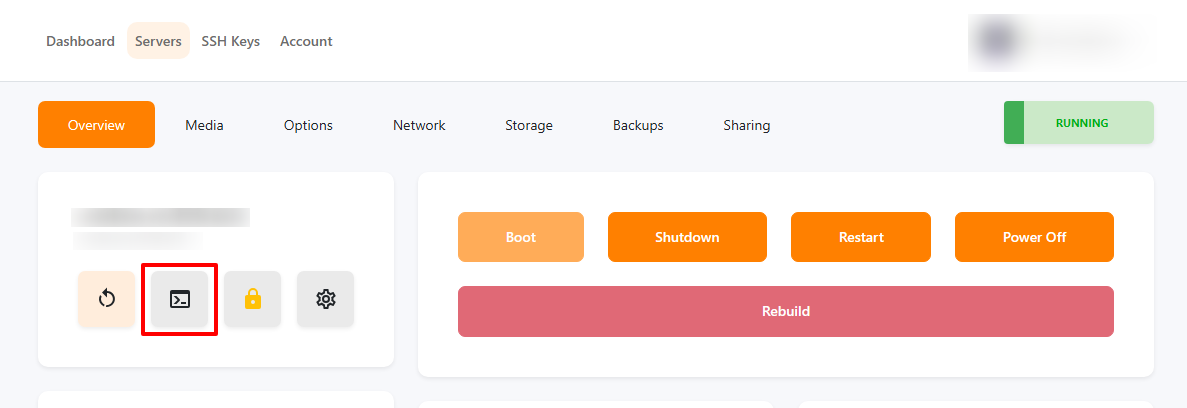
On the server management page, under the “Overview” tab, locate the server control icons on the left-hand side. Click the VNC Console icon (the second icon from the left, displaying a terminal screen) to open the VNC Console in a new browser window.
Step 3: Unlock and Log In to Your Windows VPS
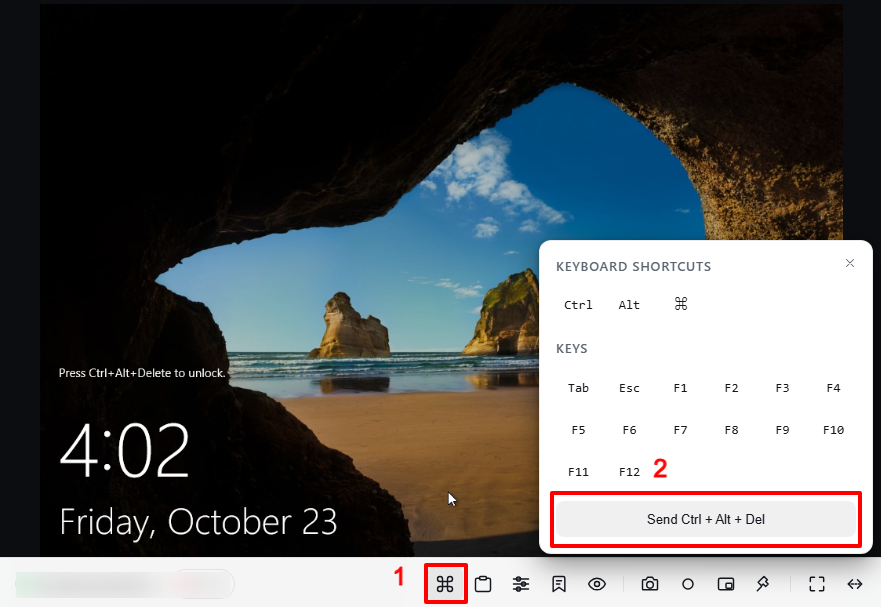
Once the VNC Console opens, move your mouse to the bottom of the window to display the VNC toolbar, which is normally hidden.
-
Click the Keyboard Shortcuts icon (marked as 1 in the screenshot) on the bottom toolbar.
-
In the menu that appears, click “Send Ctrl + Alt + Del” (marked as 2 in the screenshot) to access the Windows Server login screen.
-
Enter your Windows VPS login credentials to log in to the server.
Step 4: Open Network Settings
At the bottom of the Windows Server screen, locate the Network Settings icon in the taskbar.

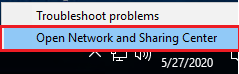
Step 5: Right-click the Network Settings icon and select “Open Network and Sharing Center.”
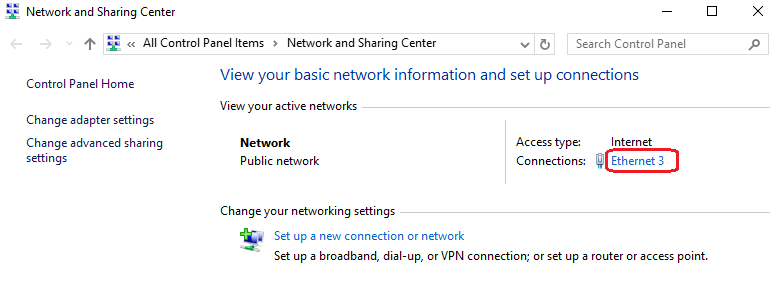
Step 6: In the Network and Sharing Center window, click the Ethernet connection (e.g., Ethernet 3) under Connections.
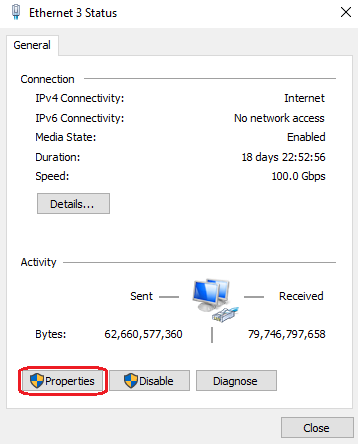
Step 7: Once the Ethernet Status window opens, click “Properties.”
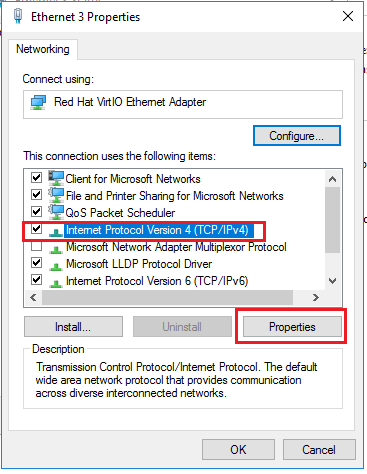
Step 8: In the Ethernet Properties window, select “Internet Protocol Version 4 (TCP/IPv4)” and click “Properties.” Alternatively, you can double-click “Internet Protocol Version 4 (TCP/IPv4)” to open its properties directly.
Select “Use the following IP address” and enter the IP address, subnet mask, and default gateway provided in your VPS setup email. Next, select “Use the following DNS server addresses” and enter the required DNS server details.
Once you have entered all the required details, click “OK” to save the settings.
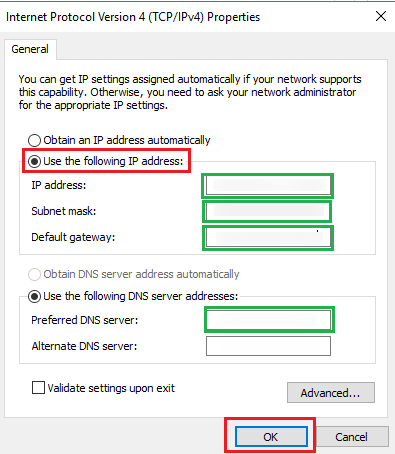
Important: Carefully check the IP address, subnet mask, default gateway, and DNS details against the VPS configuration information provided in your VPS setup email before saving the settings. Entering incorrect network details may prevent you from connecting to your VPS through Remote Desktop (RDP).
After clicking “OK” to save your IPv4 settings, Windows may display a network confirmation prompt. If prompted, review the message and select the appropriate option to proceed. This prompt may not appear on every VPS.
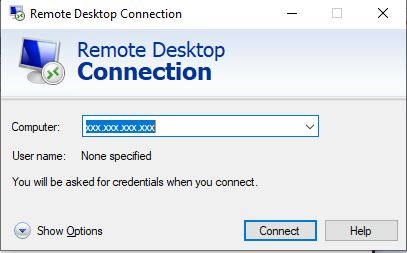
Step 10: Finally, test your connection using Remote Desktop Connection (RDP). Enter your Windows VPS IP address in the Computer field and click “Connect.”